Connecting with the Geneious Biocode Plugin
BWP Biocode Plugin connection details
Install the latest version of the Biocode Plug-in. Check the Updates section of the Home Page to see the latest version available. If you do not have the latest version, then follow the instructions in the Geneious plugins section of the previous page.
Once the Biocode plugin has been successfully installed, you can now connect by right-clicking on the Biocode icon in the Sources panel and click “Login”.
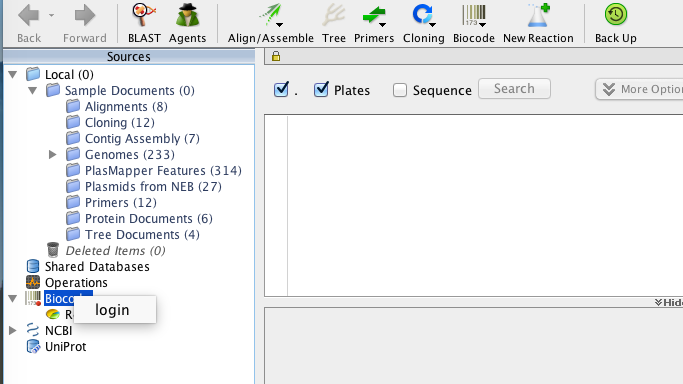
This will open the Biocode Connections window that looks like this:
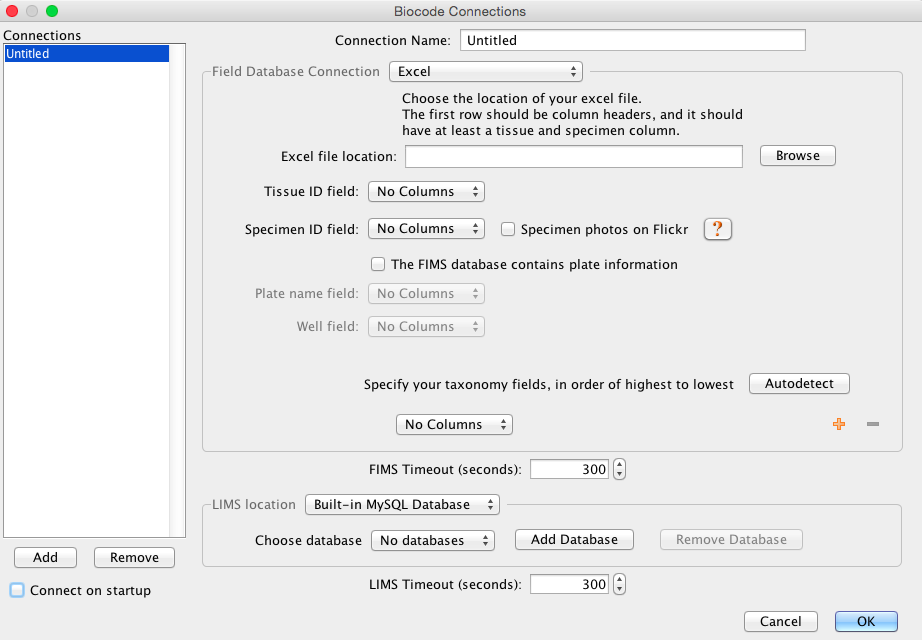
Connection Name and Method
Enter a value in the Connection Name so that the plug-in saves this information. Connection Method should be “Direct FIMS/LIMS”.
Field Database Connection
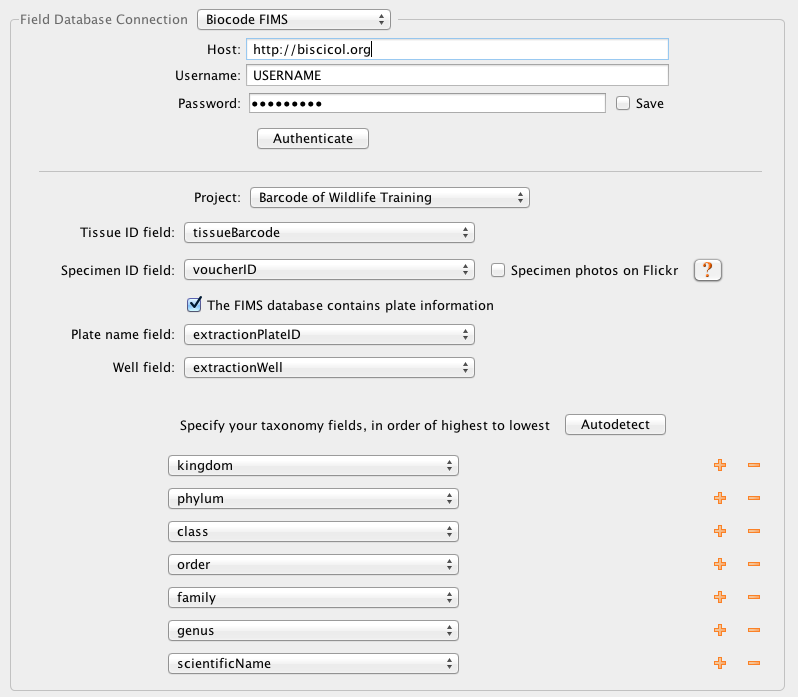
In the Field Database Connection section, start out by selecting “Biocode FIMS” from the dropdown.

This will auto-fill the Host box with “http://biscicol.org”. You will need to manually change this entry to “http://www.biscicol.org”. This new address will be fixed in future versions of the Biocode plug-in, but this manual correction is necessary until then. Enter the FIMS Username and Password that Mike Trizna assigned to you during training. Make sure to click the “Save” box, and then the “Authenticate” button to ensure you can connect to FIMS.
After authenticating, the Project drop-down will now be populated with only the FIMS projects that you have access to. Choose the project that corresponds with your country.
- Tissue ID field
- For “Tissue ID field”, select “tissueBarcode”.
- Specimen ID field
- For “Specimen ID field”, select “voucherID”.
Make sure to check the box next to “The FIMS database contains plate information”.
- Plate name field
- For “Plate name field”, select “extractionPlateID”.
- Well field
- For “Well field”, select “extractionWell”.
Finally, click the “Autodetect” button to automatically populate the different taxonomy fields.
The completed Field Database Connection should look like this:
LIMS Database Connection
In the LIMS Location section, start out by selecting “Remote MySQL Database” from the dropdown.
- Server Address
- For “Server Address”, copy and paste in “db.bwplims.info”.
- Port
- For “Port”, make sure it is set to “3,306”.
- Database Name
- For “Database Name”, enter either “kenya_lims”, “mexico_lims”, or “south_africa_lims” depending on which partner country you are affiliated with.
- Username and Password
- Finally, for the “Username” and “Password” boxes, enter the LIMS database Username and Password that Mike Trizna assigned to you via email.
Make sure that the checkbox next to “Save” is selected.
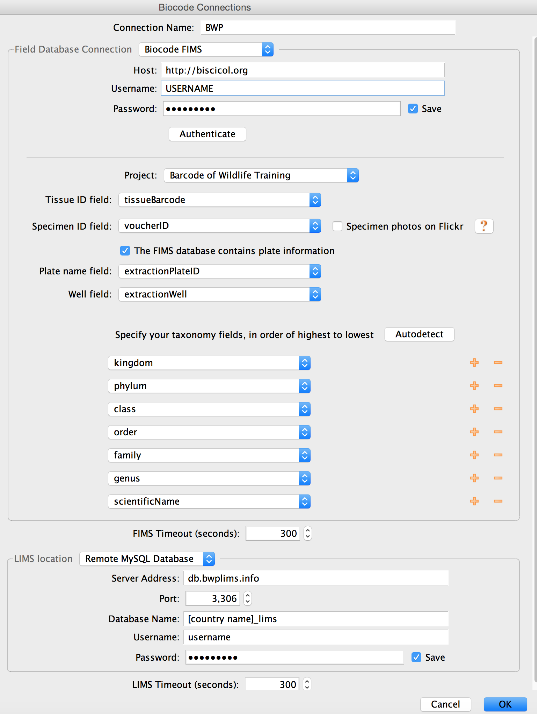
Your fully-completed Biocode Connection window should look like this: