Annotating for ITS GenBank Upload
Since ITS1 and ITS2 are not genes and do not encode proteins, you cannot use the automated “Add Gene & CDS features” button. You are going to have to individually annotate each sequence.
Here are a couple of example ITS records that show what we will be trying to achieve: http://www.ncbi.nlm.nih.gov/nuccore/JN253283 and http://www.ncbi.nlm.nih.gov/nuccore/KT960182
Adding the annotation
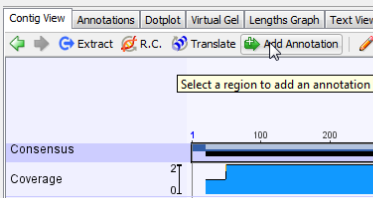
To annotate an assembly, make sure you are on the Contig View tab, and click select the consensus sequence by clicking the Consensus label.

Once the consensus sequence is selected, click the “Add/Edit Annotation” button.
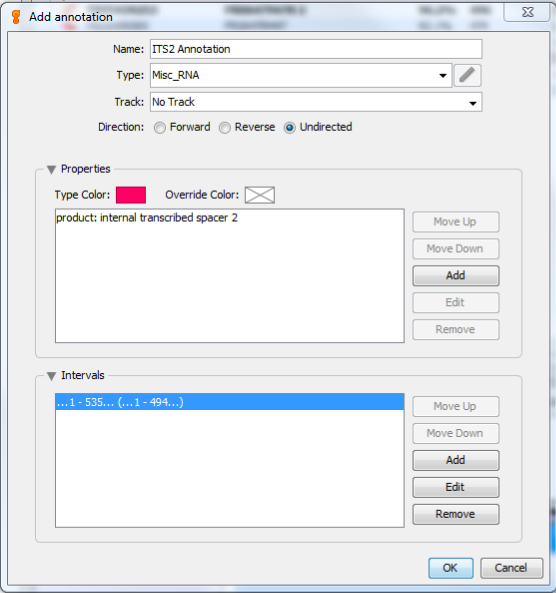
This will bring up the “Add annotation” window. In the Name box, enter any name that describes this annotation. For this example, I named it “ITS2 Annotation”. For Type, select “Misc_RNA”. Then make sure that Track is “No Track”, and select “Undirected” for Direction.
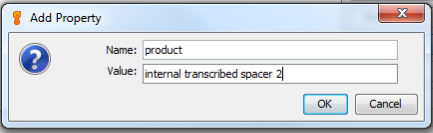
In the Properties section, click the Add button to bring up the “Add Property” window. For “Name”, enter “product”, and for “Value” enter “internal transcribed spacer 2”. Click OK.
Finally, in the Intervals section, select the number range that is already there, and click “Edit”. Make sure that both the “Truncated left end” and “Truncated right end” options are selected. Click OK.
Your completed window should now look like this:
Click OK, and the ITS2 annotation will be added to the consensus portion of the assembly.
The annotation has been added to the consensus sequence, however it extends beyond the region of the trimmed sequence. We will need to shorten it on both ends. Zoom in on the sequence using the Magnifying glass “+” button, and scroll to the left end of the sequence.
Drag the end of the annotation so that it lines up with the end of the trimmed consensus sequence.
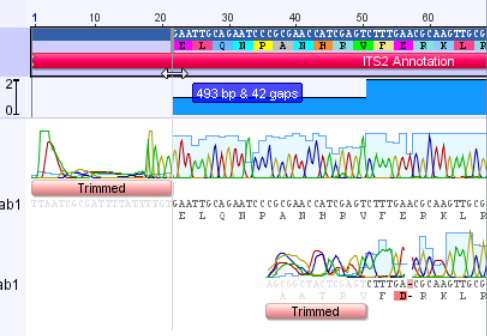
The left end of the annotation should now look like this:
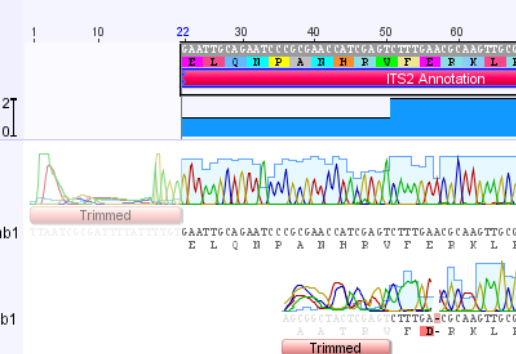
Repeat the annotation trimming procedure on the right side.
Finally, click the Save button to save this Annotation.
Submitting annotated sequences to GenBank
Make sure to follow this manual annotation procedure for all of the ITS sequences you will be submitting to GenBank.
To submit to GenBank, follow the same procedure detailed here: http://bwp-informatics.readthedocs.org/en/latest/gb_upload.html, with the following changes:
- In the “Field Mapping” section, Genetic Location should be “Genomic”
- Rather than selecting “Add Gene & CDS features using fields”, select the option above it: “Include Features/Annotations”. This will ensure the ITS Annotation you just added will be submitted with the sequence. Make sure that “Also include annotations in tracks” is NOT selected.
- In the Traces tab, select “TARGETED LOCUS” for “Experimental Strategy”. All other selections will stay the same.