Generating cycle sequencing plates
Creating the plate
- To append new cycle sequencing reactions onto existing PCR workflows, use the Geneious LIMS search window to find the corresponding PCR plate.
- Highlight the PCR plate in the Search Results Window and click “New Reaction” followed by “Create plate from existing document”.
- Select “cycle sequencing” from the drop-down menu for plate type. A cycle sequencing plate, similar to a PCR plate, will be generated.
- Cycle sequencing plates can be edited in the same manner as PCR plates are edited using the “Edit Wells” window.
- As described for PCR plates, set the thermocycling profile, reaction cocktail, primer, date etc.
- Also set the direction as Forward or Reverse.
- If your cycle sequencing plate contains reactions for both directions, then highlight the forward reactions, click on “Edit Selected Wells” and set the direction and primer. Do the same for the remaining reactions in the opposite direction.
- Save plate once complete.
Attaching raw traces to a cycle sequencing plate
Once cycle sequencing is complete, the raw trace files can be uploaded to the corresponding cycle sequencing plate or set of reactions.
To add a trace file to a single cycle sequencing reaction:
- Click open the reaction well of interest.
- In the “Edit Wells” dialog window that now appears, select the “Add/Edit Traces” button.
- A new window will appear with an “Add Sequence(s)” button located in the upper left corner of the window.
- Click the button and direct Geneious to the location of the raw trace file. Be sure to add only the correct trace (e.g. forward or reverse) to each reaction.
- To remove one or more traces from a well, select the trace or traces in question and click “Remove Sequence(s)”.
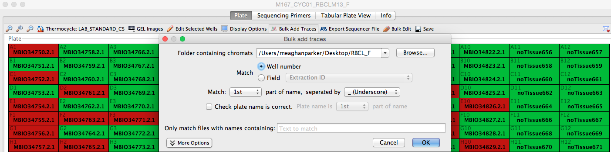
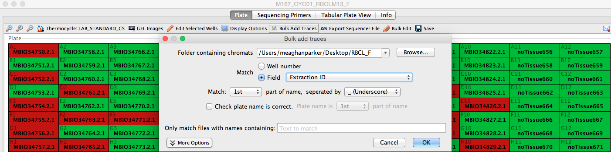
To bulk upload traces to a cycle sequencing plate or set of reactions:
- Open the appropriate cycle sequencing plate and click “Bulk Add Traces” on the plate’s toolbar.
- Click “Browse” to point Geneious to the location of the trace files. Traces are matched to their corresponding cycle sequencing reactions based on components found in the trace file name (i.e., well number or field) along with name delimiters. For example, to attach a sample’s trace file to it’s corresponding well position based on the well position in the trace file name (e.g., 3726294_**A01**_capture.ab1), the user would select the “Well number” button followed by “Match 2nd part of name”, “separated by_(Underscore)” in the “Bulk add traces” dialog window.
- To attach a sample’s trace file based on a field (in this case, extraction barcode 3726294_A01_capture.ab1), the user would select the “Field” button followed by “Extraction Barcode” from the drop-down menu along with “Match 1st part of name, separated by _(Underscore)”.
- After all traces have been attached, click “OK” to save.
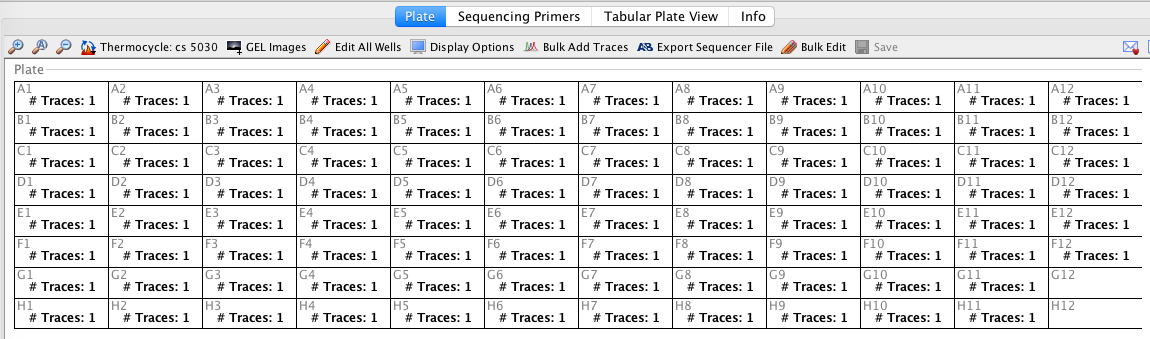
- To double check that the traces have successfully attached the user can change the display options of the cycle sequencing plate so that # Traces is displayed. If the traces have attached correctly, wells should display “# Traces: 1”.
- With the traces now attached to their corresponding cycle sequencing reactions, they are ready to be downloaded into the Geneious Assembler module.